Making a Cake with Children Part 3 – Decorating
Welcome to the final part of this series. If you missed the other parts:
Part 1 – Baking
Part 2 – Frosting
Now we get to work on decorating our cake! My children loved this part. They pretended to be professionals. They made a design that they wanted to create and kept referring back to it. It was fun to watch.
Tools and equipment :
01) Patience! [I really want to buy this stuff!]
02) Hand Vacuum [Accept that there is going to be a mess]
03) Soap [Good old soap and water to clean sticky hands]
04) APRONS for everyone, including any pets that might wander by! [There is no link here. Lubby made ours.]
05) Leftover Frosting from Part 2 [Do you still have some?]
06) Measuring cups [I have a mix and match of these.]
Optional equipment
07) Food color
08) Piping tips [These are really fun for the children.]
As an Amazon Associate, I earn from qualifying purchases. Please use my links.
Directions
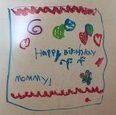
Have your children draw a reference design. This helps them to choose colors and refine their thoughts. Here is what mine came up with:
Mix up your colors! Add the food coloring to your white frosting and mix it to the color you like. A little goes a long way so go easy and build up. We made light blue and pink.
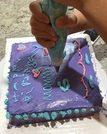
I loaded the coloring into the piping bags and let the children go to work.
I helped with the “mommy,” but had to strictly follow guidelines.
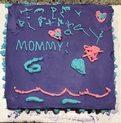
Here is the finished product:
It was lots of fun to do and my children enjoyed it so much they want to make another one, and are already thinking up design ideas! I enjoyed myself too. I was able to walk away during the piping process and sat down to relax. Oh, and at the end of the day… I got to eat some cake. I think that it was time well spent.
Until next time
-Hubby
Pingback: Making a Cake with Children Part 2 - Frosting
Pingback: Making a Cake with Children Part 1 - Baking